Rifle Stock Camoflauge Painting DYI: A How-To Guide
By: Chad L.
If you are like me, you probably don’t like lying prone and getting a cheek weld on a black stock when it’s been sitting in the Texas summer sun. If you arent, you have not lied down prone and put your cheek on a black stock that’s been sitting in the Texas summer sun! Plus I like hacking stuff and have always loved my FN SPR and the upgraded McMillan A-5 stock with the adjustable cheek piece, but envious of the GA Precision (GAP) cammo pattern… so after figuring out that I wanted black, dark brown, sand, and OD green, I purchased the Krylon flat camo cans (plus a clear matte finish sealer) and set out with some blue painters tape and an Xacto knife.
In the 1st pic.. you can see where I covered all the metal parts, flush cups, and masked off the areas that I wanted to stay black. There is no “pattern” or template to use for this.. and I found the easiest thing to do was just hold the roll and make an organic looking block on the tape itself, as it was easier to peel off that way. Note: I tried to 1st put the tape down on butcher paper, but that was a waste of time, at least for me. Obviously, as the stock is black, that will be the base coat.

From there I chose to apply dark brown. Sprayed on using a coat hanger through the swivel stud outside. The following picture shows what it looked like after it dried and I applied the 2nd layer of blue tape (leaving the tape from the previous step alone)

Then it was simply a matter of putting down the sand color. A word about this also: in hindsight, I would have done this color 1st, under the dark brown, as the layers of tape built up and the texture of the fiberglass allowed it to bleed through the seems.

After the tan dried, just rinse and repeat.. overlapping will make the colors layer nicely like the GAP pattern that we all love so much.

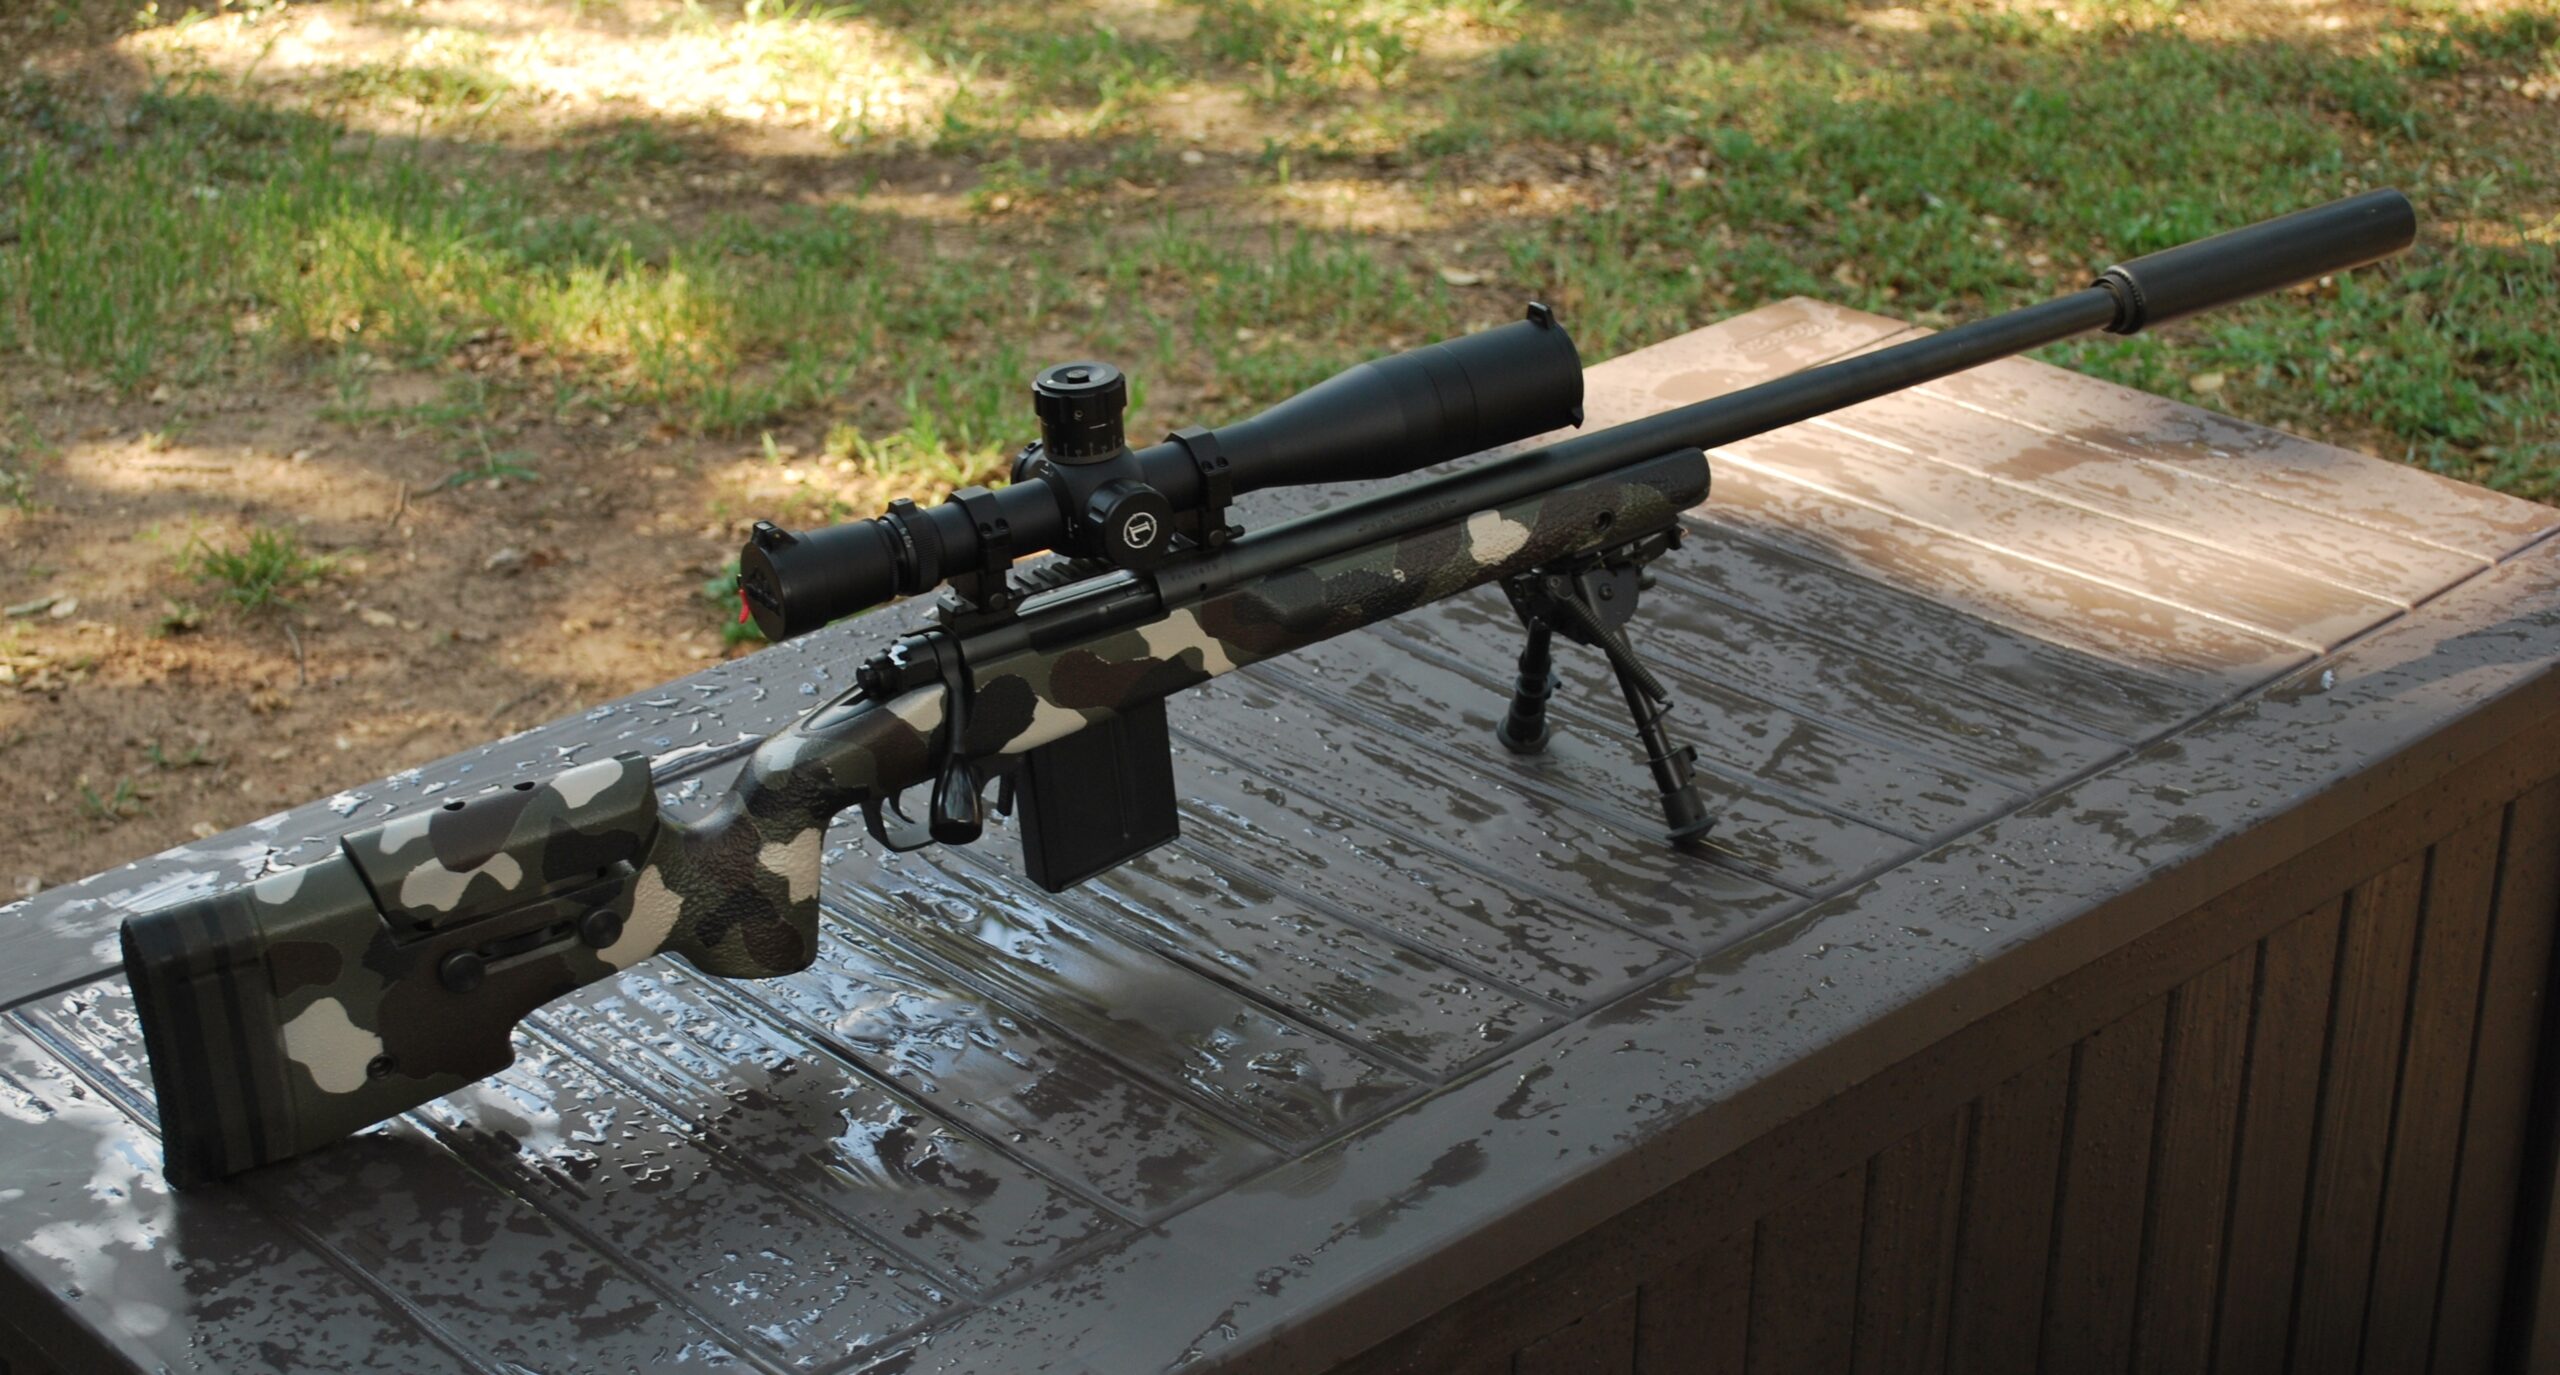
After each drying cycle in the AC, (approximately 2-3 hours) I finally pulled off all of the tape and really liked the way it looked (aside from the bleeds which you can touch up with a paint brush)

In this pic you can see how it hung during the drying stages in my hobby room – this was the matte clear sealer after it had been applied.

From there, it was just a matter of making sure it was dry, and putting it all back together. I’m happy with as little money as it cost me and it was a good father/son bonding experience with my 9 year old.. who wants to paint his .17HMR but I’m not going for that as it has a nice laminate wood stock. This should be a thumbnail to a full-size photo.

At any rate, if you do one, post a pic on our FB page and tell us what worked for you!
https://www.facebook.com/TacticalGunReview
Thanks for visiting TGR and feel free to comment, share, hell – we promise not to mind if you write you own review. (HINT HINT!!!)
GlockandRoll
Latest posts by GlockandRoll (see all)
- SWFA SS 3-15×42 Tactical Rifle Scope Review – September 29, 2013
- STAFF REVIEW: Kahles K624I 6-24×56 review – April 20, 2013
- STAFF REVIEW: McNally trigger for the Glock – March 30, 2013

Leave a Reply